


Every day, the average household discards a surprising volume of organic material — fruit peels, coffee grounds, vegetable scraps, cardboard egg cartons — most of which ends up buried in a landfill, where it generates methane gas as it decomposes. There is, however, a genuinely elegant and surprisingly enjoyable way to transform that same waste into something valuable for your home, your garden, and the planet. Vermicomposting — the practice of using worms to break down organic material into rich, nutrient-dense compost — has been embraced by households, schools, and community gardens around the world, and it’s more accessible than most people realise.
I’m Al, and composting with worms is honestly one of the most unexpectedly wonderful habits I’ve picked up on my journey toward a more sustainable everyday life. I’m no scientist or expert gardener — just a curious person who decided one day to try letting a small bin of worms handle my kitchen scraps, and found myself completely hooked within the first few weeks. Whether you’re already composting and curious about worms, or you’ve never thought about where your banana peel ends up, I’m glad you’re here. Pull up a chair — by the time you finish this article, you’ll have everything you need to start your own worm bin with confidence.
Understanding Vermicomposting
The role of the worm: At its core, vermicomposting is a biological process in which specific species of earthworms consume organic material and excrete it as worm castings — a dark, crumbly, nutrient-rich substance so prized by gardeners it’s often called “black gold.” Unlike traditional hot composting, which depends on microbial heat generated in large outdoor piles, vermicomposting works at room temperature and can be managed in a compact bin kept anywhere from a kitchen bench to a spare cupboard or a shaded balcony. This makes it one of the most accessible forms of composting available, regardless of how much space you live with.
Not all worms are created equal: The worms used in vermicomposting are not your typical soil-dwelling garden earthworm. Eisenia fetida — the red wiggler — along with Lumbricus rubellus, are the two species most commonly used in vermicomposting systems worldwide. These are epigeic, or surface-dwelling, species that evolved to thrive in rich organic environments such as leaf litter and decomposing manure. They reproduce quickly, tolerate a wide range of conditions, and are highly efficient processors of food waste — a healthy, well-established worm population can work through impressive quantities of kitchen scraps every single week.
The science beneath the surface: Inside the worm’s digestive tract, a community of microorganisms and enzymes breaks down organic material in ways that fundamentally transform its structure and nutritional profile. The resulting castings are far more biologically active than standard compost, containing beneficial bacteria, fungi, plant growth hormones, and a stabilised form of humus that significantly improves soil structure, water retention, and nutrient availability. The liquid that drains from a worm bin — commonly called “worm tea” or leachate — can be diluted and applied directly as a potent liquid fertiliser for both indoor and outdoor plants.
A practice with deep roots: Vermicomposting is no modern fad. Charles Darwin devoted a significant portion of his later scientific career to studying earthworms, publishing his 1881 findings in a book in which he argued that worms were among the most important animals in the history of the earth. Today, that foundational science has been expanded and refined across university laboratories and organic farms worldwide, and what was once an agricultural technique is now equally at home in apartments, school classrooms, and suburban backyards.

Now that we understand what vermicomposting is and how it works at a biological level, let’s take a closer look at why so many people around the world are making it a permanent part of their lives — and what it can genuinely do for your garden, your household, and the broader environment.
The Genuine Benefits of Vermicompost
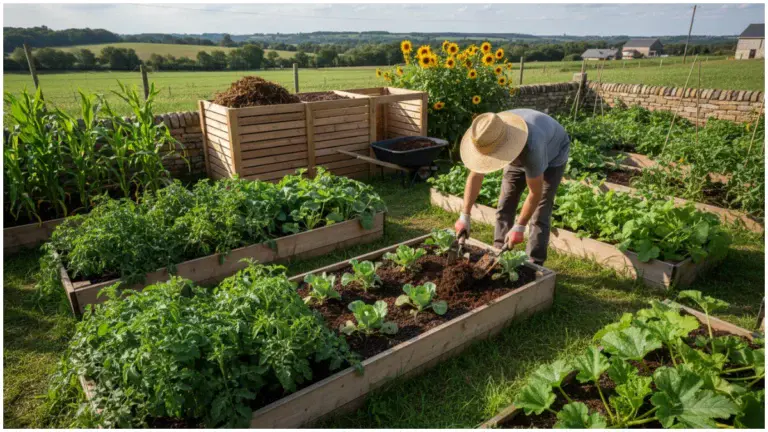
A gift to your garden soil: Vermicompost is one of the most potent natural soil amendments you can add to a garden. When incorporated into beds, pots, or raised planters, it improves soil structure by creating a crumbly, well-aggregated texture that allows roots to penetrate easily, retains moisture without becoming waterlogged, and promotes natural aeration. Cornell greenhouse research has demonstrated that vermicompost can be used as a complete fertiliser source for organic vegetable and flower production, producing measurable improvements in growth, yield, and plant health compared to standard growing mixes used without amendment.
Feeding plants the right way: The nutrients locked inside vermicompost are present in a form that plants can absorb directly and efficiently. Unlike synthetic fertilisers, which can cause nutrient burn or leach quickly through the soil profile, vermicompost releases nitrogen, phosphorus, and potassium slowly and steadily, nourishing plants over weeks and months. It also delivers an impressive range of micronutrients — zinc, manganese, copper, and iron — as well as naturally occurring plant growth hormones including indole acetic acid, which are absent from most commercial fertilisers entirely.

The environmental case: The environmental benefits of vermicomposting extend well beyond the garden. Organic waste sent to landfill decomposes in anaerobic (oxygen-free) conditions, generating methane — a greenhouse gas the US Environmental Protection Agency identifies as more than 28 times more potent than carbon dioxide at trapping heat in the atmosphere. Diverting kitchen scraps into a worm bin keeps that material out of landfill, actively reduces your household’s carbon footprint, and returns nutrients to living soil rather than allowing them to volatilise into the atmosphere. Even a small household bin processing just a few kilograms of food waste per week makes a measurable difference over the course of a year.
A win for water, too: Soil enriched with vermicompost retains water significantly more effectively than depleted or compacted soil — a characteristic that matters enormously in regions facing drought, heat waves, or seasonal water restrictions. Improved water retention means less irrigation is needed, which saves both water and money. Well-structured, biology-rich soil also reduces surface runoff, which protects local waterways and aquatic ecosystems from nutrient pollution — an issue affecting river systems and coastlines across every continent.
The benefits are compelling, and the good news is that getting started requires far less equipment and expertise than most people expect. Let’s walk through exactly what you’ll need and how to set up your very first worm bin from scratch.
Setting Up Your First Worm Bin
Choosing your bin: You don’t need anything elaborate to begin. A basic vermicomposting setup can be as simple as a plastic storage tub with drainage holes drilled into the base, or as purpose-built as a multi-tray stacking system like the Worm Factory 360, which allows you to manage multiple layers of composting at once and simplifies harvesting. Whatever container you choose, the key requirements are that it be dark (worms are acutely light-sensitive), provides some form of drainage, and has adequate capacity for your household’s food scraps. For a single person or a couple, a bin measuring approximately 30 x 60 cm is generally sufficient.
Bedding matters: Before introducing worms, you need to prepare their bedding — the material in which they’ll live and move between meals. Ideal bedding includes shredded newspaper, torn cardboard pieces, coconut coir, or aged leaf litter. The bedding should be moistened until it feels like a wrung-out sponge: damp throughout but not dripping. This moisture level is critical to the health of the system; too dry and the worms will dehydrate and stop feeding, too wet and the bin will turn anaerobic and begin producing unpleasant odours.
Adding your worms: Once your bin is prepared, it’s time to introduce your worms. Most experts recommend starting with between 500g and 1kg of red wigglers for a standard household bin. You can source them from specialist vermicomposting suppliers, some garden centres, or local composting groups and community swaps. Once added, give the worms a day or two to settle before feeding them — this brief acclimatisation period reduces stress on the worms and gives them time to spread through the bedding before processing begins.
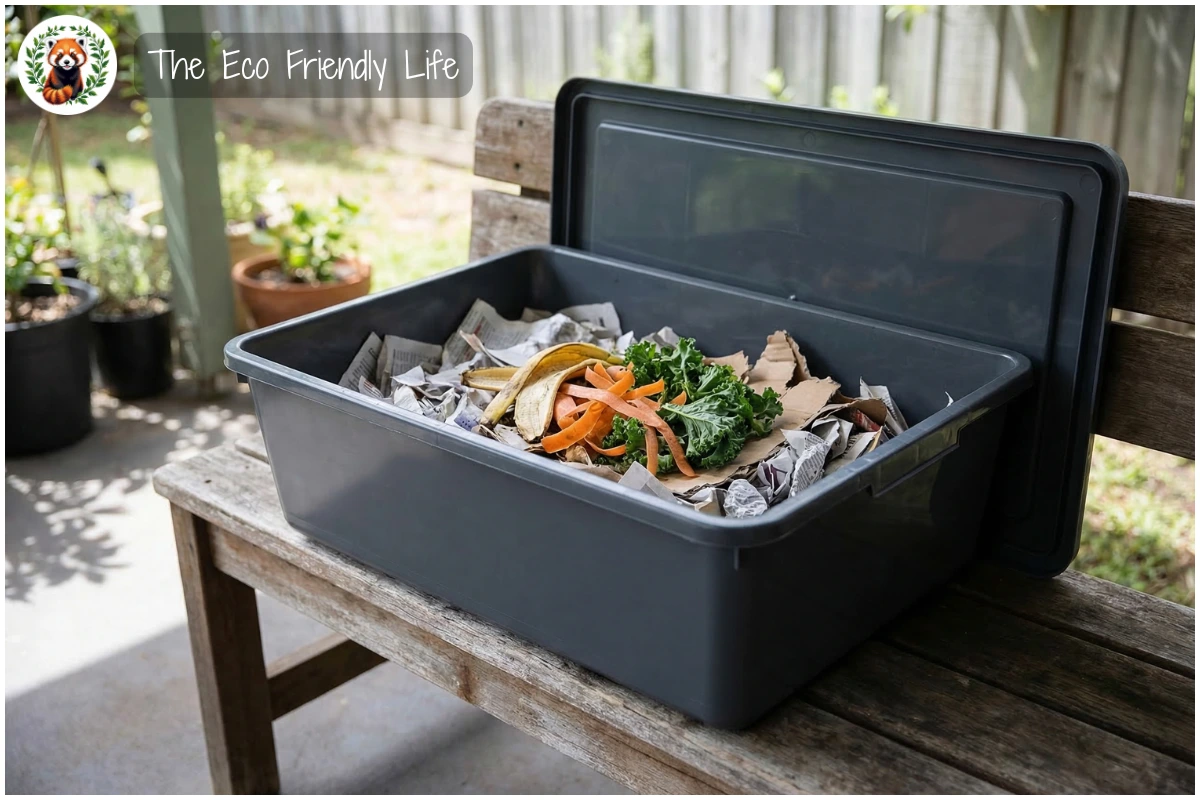
What to feed and what to avoid: Red wigglers will process most fruit and vegetable scraps, coffee grounds and paper filters, tea bags, eggshells, and shredded paper with enthusiasm. Foods to avoid include meat, fish, dairy, oily or heavily processed foods, and large amounts of citrus or onion, which can disrupt the bin’s pH balance and attract unwanted pests. As a general practice, always bury food scraps under the surface layer of bedding rather than leaving them exposed — this simple habit greatly reduces fruit fly activity and keeps the bin smelling clean and earthy.
Getting the bin established is the steepest part of the learning curve, and once that’s done the day-to-day routine becomes genuinely easy. Before we look at the details of long-term care and harvesting, here are some excellent products and retailers that can help you get your vermicomposting setup off to the very best start.
Brands and Tools That Support the Planet — Our Recommendations
All four of the adult retailers below were chosen specifically because they sell vermicomposting products — worms, bins, starter kits, and composting supplies — that directly relate to everything covered in this article. Whether you’re sourcing your first red wigglers, choosing a bin that fits your living space, or looking for a compact kit to get your system running this week, these are the places to start. We’ve also included two great options for families who want to bring children into the world of vermicomposting in a fun, hands-on way.
Our Retailer Recommendations for Adults
Uncle Jim’s Worm Farm
One of the most established vermicomposting suppliers available, Uncle Jim’s is the go-to source for live red wiggler worms — the same Eisenia fetida species discussed throughout this article. They also carry a wide range of worm bins and composting systems, including the popular Worm Factory 360 multi-tray bin, making them a one-stop shop for everything you need to get started.
Urban Worm Company
The Urban Worm Company makes the Urban Worm Bag — a breathable, continuous-flow fabric vermicomposting bin engineered specifically to solve the biggest challenge beginners face: harvesting finished castings without disturbing the worm population. Its bottom-opening design lets you remove finished vermicompost from below while worms continue working above, making the entire harvesting process described in this article far simpler in practice.
Worm Bucket
Designed specifically for indoor vermicomposting in small spaces, the Worm Bucket starter kit comes with everything you need except the worms — coco coir bedding, perlite for drainage, an easy-drain spigot for collecting worm tea, and escape-proof ventilation. It’s a compact, well-engineered solution for anyone in an apartment, condo, or home with limited space who wants to begin vermicomposting straight away.
Eartheasy
Eartheasy is a trusted sustainable living retailer carrying a carefully selected range of worm bins — including the Worm Factory 360 and the Hungry Bin, a continuous-flow composter — alongside soil amendments, gardening tools, and seed-starting equipment. Once your first batch of vermicompost is ready to harvest, Eartheasy is an excellent place to find quality gardening products that will help you put those nutrient-rich castings to work in your garden.
Our Retailer Recommendations for Kids/Families
Worm Bucket
With its compact footprint and simple three-step process — add worms, feed scraps, harvest castings — the Worm Bucket is one of the most child-friendly vermicomposting setups available. It fits neatly under a kitchen sink or on a balcony, produces no odour when managed correctly, and gives children a genuine, tangible science project they can observe and participate in every single day.
Green Kid Crafts
Green Kid Crafts delivers eco-focused STEAM subscription boxes for children aged 3–10+, with themed kits exploring nature, soil science, living ecosystems, and environmental stewardship. Families with younger children (ages 3–5) can choose the craft-leaning Junior subscription, while older kids (ages 5–10+) are well served by the more science-focused Discovery subscription — each box containing 4–6 hands-on projects and a 12-page learning magazine, making them a wonderful educational companion to a family vermicomposting project already underway at home.
Now that you have a great range of products to explore, let’s move into the ongoing care of your worm farm — including how to keep it running smoothly through every season and how to harvest that first rewarding batch of finished vermicompost.
Caring for Your Worm Farm and Harvesting the Rewards
Day-to-day maintenance: Once your bin is established, daily care is genuinely minimal. Feed your worms every two to three days, burying scraps in a different area of the bin each time to allow previously added food to break down fully before more is introduced. Check moisture levels regularly — if the bin feels dry, mist it lightly with water; if it smells sour or appears waterlogged, incorporate dry shredded cardboard to absorb excess moisture and restore airflow. A well-maintained worm bin should have only a mild, pleasant smell — similar to the earthy scent of forest soil after rainfall.
Managing temperature and environment: Red wigglers are most productive between 15°C and 25°C (59°F–77°F) and are vulnerable to extremes at both ends of that range. In colder climates, bring your bin indoors during winter months or insulate it with hessian sacking or foam sheeting. In warmer climates, position the bin in a shaded, well-ventilated space and ensure it doesn’t overheat — temperatures above 35°C (95°F) can be fatal to a worm population very quickly. Avoid placing the bin in direct sun or near heat-generating appliances.
Troubleshooting common problems: Even carefully managed bins occasionally hit a snag. Fruit flies are the most common issue and are almost always caused by food scraps left exposed at the surface. Covering each feeding with a layer of moist newspaper or cardboard acts as a simple and highly effective barrier. Persistent odours usually indicate overfeeding, excess moisture, or the presence of inappropriate food items — remove the offending material, add plenty of dry carbon-rich bedding, and the bin will typically correct itself within a day or two. If worms begin congregating near the lid or walls of the bin, check temperature, moisture, and pH — bins that become too acidic can be gently corrected with a small amount of crushed eggshells or agricultural lime.

Harvesting vermicompost: After two to four months — depending on your worm population, feeding frequency, and ambient temperature — you’ll find that portions of the bin have been transformed into uniformly dark, fine-textured castings. The simplest harvesting method is the migration technique: push all existing material to one side of the bin, add fresh bedding and food scraps to the empty side, and wait two to three weeks for the worms to migrate toward the fresh food. The finished castings left behind can then be scooped out and used directly. Apply vermicompost as a top dressing to garden beds, blend it into potting mix at a ratio of roughly 20–30%, or brew it into liquid fertiliser by steeping a handful in a bucket of water overnight before diluting and watering it in.
With a solid picture of how to maintain and harvest your worm farm, it’s time to bring everything together with some practical, everyday actions you can start putting into place right now.
Practical Daily Tips You Can Action Today
Small, consistent habits are what make vermicomposting genuinely sustainable over the long term. Here are ten straightforward actions you can begin immediately.
| Tip | How to Implement | How It Helps |
|---|---|---|
| Start a kitchen scrap container | Keep a small lidded container on your bench to collect daily scraps, adding them to the bin every two to three days. This reduces how often you open the bin and maintains a stable environment. | Consistent feeding schedules reduce stress on the worm population and help maintain a balanced, odour-free bin. |
| Chop or shred scraps before adding | Tear or cut food scraps into smaller pieces before placing them in the bin. Smaller pieces expose more surface area to worms and microbes. | Smaller scraps break down faster, shortening the time between feeding and finished castings. |
| Balance greens with browns | For every load of food scraps (greens), add a layer of shredded newspaper or torn cardboard (browns). This simple ratio prevents the bin from becoming too wet or smelly. | Carbon-rich browns balance nitrogen-heavy food scraps, maintaining a healthy and productive bin environment. |
| Collect and dilute worm leachate | Place a tray under your bin to catch liquid drainage. Dilute it at a ratio of 1:10 with water before applying to plants. | Worm leachate is rich in plant-available nutrients and makes an excellent liquid fertiliser for indoor and outdoor plants. |
| Add crushed eggshells regularly | Rinse, dry, and crush eggshells before adding them to the bin weekly. They are a natural calcium source for the worms. | Eggshells buffer the bin’s pH, keeping conditions comfortable for worms and improving the mineral content of finished castings. |
| Keep a spray bottle nearby | Check the bin’s moisture level every day or two and mist the surface lightly if it starts to feel dry. | Correct moisture levels are the single biggest factor in maintaining a healthy, productive, and odour-free worm bin. |
| Rotate your feeding zones | Divide your bin into sections and feed in a different area each time, cycling through them in rotation. | Even feeding zones prevent pockets of over- or under-processed material and make harvesting much easier. |
| Avoid overfeeding | Add new food only once the previous batch is mostly broken down — roughly every 48–72 hours for an established bin. | Overfeeding is the leading cause of odour, pest problems, and stressed worms; restraint produces the best results. |
| Mix vermicompost into potting soil | Blend 20–30% finished vermicompost into potting mix when repotting plants or sowing seeds. Even a small proportion makes a noticeable difference. | Vermicompost dramatically improves moisture retention, nutrient availability, and biological activity in any growing medium. |
| Involve your children | Let children take turns feeding the worms and observing the bin. Keep a simple observation journal tracking what goes in and what changes. | Children who engage with composting early develop a genuine understanding of natural cycles and are more likely to carry sustainable habits into adulthood. |
If reading through those tips has sparked some questions, you’re not alone — vermicomposting is one of those topics where the more you learn, the more curious you become. Here are quick, straightforward answers to the questions people ask most when they’re just getting started.
Frequently Asked Questions
Will my worm bin smell bad?
A healthy, well-managed worm bin should have only a mild, earthy scent. Unpleasant odours are almost always a sign of overfeeding, excess moisture, or inappropriate food items — all of which are straightforward to correct once identified.
How long before I have usable vermicompost?
Most beginners can expect their first harvest within two to four months, depending on the size of the worm population, feeding frequency, and ambient temperature. A larger worm population in warmer conditions will generally produce finished castings more quickly.
Can I keep a worm bin indoors?
Absolutely — worm bins are well-suited to indoor living spaces including apartments, laundry rooms, and the space under a kitchen sink. A properly managed indoor bin produces no unpleasant odours and takes up very little space.
How do I know if my worms are healthy?
Healthy red wigglers are reddish-pink, active, and move away from light quickly when the lid is opened. If worms appear pale, lethargic, or are clustering near the lid or edges of the bin, check moisture, temperature, and pH levels and adjust accordingly.
Organisations to Support — Our Recommendations
If this article has inspired a broader interest in soil health and sustainable food systems, these organisations are doing meaningful work worth knowing about and supporting.
- The Rodale Institute has spent over 75 years advancing the science of organic agriculture and regenerative farming, with healthy, living soil at the heart of their mission. Their ongoing composting and soil biology research underpins much of what we know about sustainable growing, and you can directly help fund that work by donating to Rodale Institute.
- The Soil Association is a UK-based charity championing sustainable food, farming, and land use, with soil biology and ecological farming at the core of their advocacy. Their education programmes, organic certification standards, and policy campaigns make a real difference to farming practices and consumer awareness globally. If healthy soil and sustainable food systems matter to you, consider becoming a Soil Association supporter.
- The Composting Research & Education Foundation (CREF) is the charitable arm of the US Composting Council, dedicated to funding composting research, professional training, and public education — helping to translate vermicomposting science into practical, community-wide impact. You can help expand composting knowledge and infrastructure worldwide by contributing to CREF.
Together, these organisations represent the broader movement to restore soil health, reduce organic waste, and build more sustainable food systems — causes that vermicomposting at home connects to directly.
Resources and Further Reading
For those who want to explore vermicomposting in greater depth, these expert sources provide reliable, research-backed information.
- Cornell University’s Worm Composting Resource Hub, developed by the Cornell Waste Management Institute, is one of the most comprehensive freely available guides on vermicomposting for beginners and educators alike. It covers worm biology, bin design, bedding and feeding, harvesting, and troubleshooting in clear, accessible language. Dive deeper at Cornell’s worm composting hub.
- The USDA’s vermicomposting overview, drawing on research from North Carolina State University Extension, provides a clear and practical government-backed introduction to starting and maintaining a worm bin — from container selection through to harvesting methods. Read it in full at the USDA’s vermicomposting guide.
- Cornell’s Composting Systems guide, produced by the Cornell Waste Management Institute, offers an in-depth scientific look at vermicomposting alongside other composting methods — covering temperature ranges, worm biology, environmental conditions, and practical system design for both home and educational settings. Access it as a free PDF through Cornell’s composting systems guide.
These three resources together cover everything from the foundational science to the hands-on practicalities, and are an excellent starting point for anyone who wants to go further.
Our Related Articles
What Is Composting And How Does It Work?
Every day, millions of people across the globe toss vegetable peels, coffee grounds, and grass clippings into the rubbish bin, never realizing they’re throwing away…
Read More
How To Transition To A Zero Waste Lifestyle
Every day, the average person generates waste that adds up to a staggering problem for our planet. With 353 million tonnes of plastic waste created…
Read More
Exploring Sustainable Gardening And Its Benefits
Sustainable gardening represents one of the most accessible pathways toward environmental stewardship that individuals can embrace in their daily lives. Whether you cultivate a small…
Read MoreConclusion
Vermicomposting is one of those rare sustainable practices that is genuinely simple to start, deeply satisfying to maintain, and meaningful in its impact — whether you’re measuring that impact in the quality of your garden soil, the volume of waste diverted from landfill, or the life lessons it offers the next generation. From choosing your first bin and selecting the right worms, to understanding the biology at work beneath the lid and harvesting your first batch of finished castings, the journey from kitchen scraps to black gold is one well worth taking.
You don’t need a garden, a yard, or any special skills to begin — just a small container, some shredded newspaper, and a willingness to let a handful of industrious little creatures do what they do best. Start small, stay curious, and let the process teach you as you go.
Have you tried vermicomposting before, or is this something you’re considering starting for the first time? We’d love to hear about your experience — share your thoughts, questions, or worm bin wins in the comments below!